Why You’ll Love this Margarita Balls Recipe
You’re going to adore this Margarita Balls recipe for its delightful blend of flavors and textures. Each bite offers a perfect balance of sweetness and tanginess, thanks to the invigorating lime zest and the hint of margarita mix.
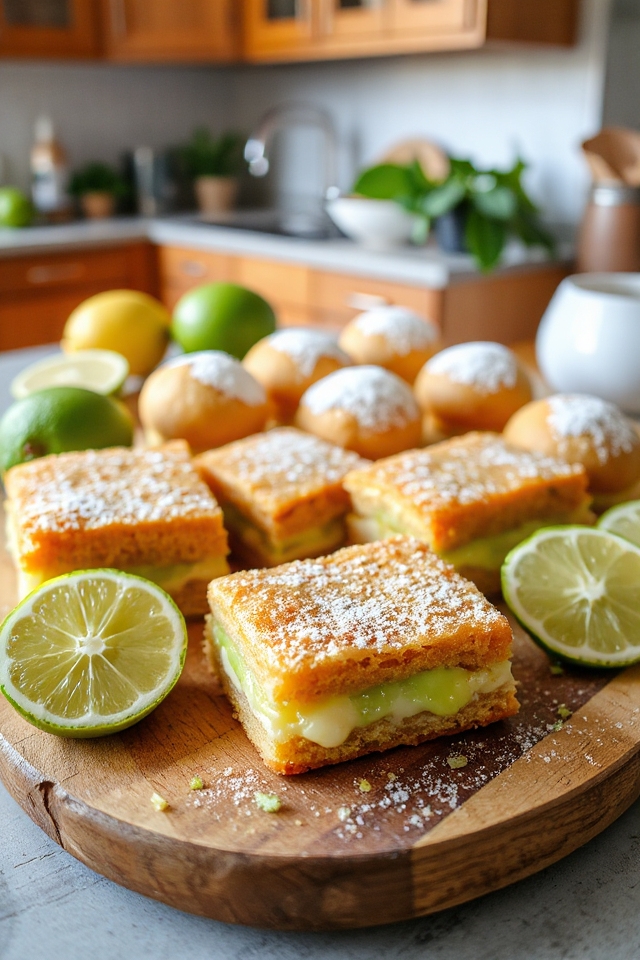
The buttery crust provides a satisfying crunch, contrasting beautifully with the soft, luscious filling. It’s an easy recipe that’s sure to impress at gatherings or simply brighten your day.
Trust me, these bars are a delightful twist on a classic dessert, making them irresistible. You’ll find yourself reaching for seconds—and maybe even thirds—because they’re just that good!
Enjoy every bite!
Ingredients of Margarita Balls
When it comes to whipping up a delicious dessert that’s both fun and a little bit fancy, Margarita Balls are a fantastic choice. They combine the zesty flavor of lime with a buttery crust, and they’re sure to bring a smile to anyone’s face.
Plus, they’re surprisingly easy to make, which means you can impress your friends without spending all day in the kitchen. So, let’s explore the ingredients you’ll need to create these delightful bars that are perfect for a party or a cozy night in.
Ingredients for Margarita Balls:
- 1 3/4 cups all-purpose flour
- 1/2 cup powdered sugar
- 1 cup butter, softened
- 4 large eggs
- 1 1/2 cups sugar
- 1/4 cup all-purpose flour (for the filling)
- 1/2 teaspoon baking powder
- 1/3 cup frozen margarita mix concentrate, thawed
- 2 teaspoons fresh lime zest
- Powdered sugar (for dusting)
Now, before you start gathering your ingredients, let’s chat about a few things.
First off, using fresh lime zest is a game-changer. It elevates the flavor and gives that extra zing that makes these bars pop. You could technically use bottled lime juice, but let’s be real—fresh is always better.
Also, if you want to kick it up a notch, consider adding a splash of tequila to the filling for an adult twist. But then again, who needs tequila when you’ve got a fantastic dessert like this?
Just remember, it’s all about balance. So whether you’re going for the classic recipe or making it a bit more adventurous, these Margarita Balls are bound to be a hit. Happy baking!
How to Make Margarita Balls
Making Margarita Balls is like a little culinary adventure that’s just waiting for you to engage. First things first, you’re going to want to grab your mixing bowl and add 1 3/4 cups of all-purpose flour, 1/2 cup of powdered sugar, and 1 cup of softened butter.
Now, I know what you’re thinking—how much butter is too much butter? Well, there’s no such thing when it comes to dessert, right? Mix these ingredients on low speed until the mixture resembles crumbs. You want to be gentle here; we’re not trying to make a flour explosion in the kitchen.
Once you’ve got that crumbly goodness, it’s time to roll up your sleeves, dust your hands with a little flour, and firmly press the mixture into the bottom of an ungreased 13×9 inch baking dish. That crust is going to be the foundation of your Margarita Balls, so give it some love.
While that buttery crust bakes at 350°F for about 20 to 25 minutes until it’s lightly golden brown, let’s shift gears and prepare the filling. In another bowl, beat 4 large eggs until they’re nice and frothy—think of it as a mini workout for your arms.
Then, add in 1 1/2 cups of sugar, 1/4 cup of all-purpose flour, and 1/2 teaspoon of baking powder. Stir it all together until it’s well blended. Now comes the fun part: pour in 1/3 cup of frozen margarita mix concentrate (make sure it’s thawed, or you’ll end up with a margarita ice cube situation) and toss in 2 teaspoons of fresh lime zest. Give it a good mix again.
Once your crust is out of the oven, you’re going to want to pour that zesty filling over it while it’s still warm—this helps everything meld together. Pop the whole thing back in the oven and bake for another 18 to 22 minutes until the top is golden brown and the filling is set.
It’s going to smell amazing, and you might find yourself doing a little happy dance in the kitchen. After it cools completely, don’t forget to sift some powdered sugar over the top before cutting it into bars. It’s like giving your Margarita Balls a little fancy outfit.
Margarita Balls Substitutions & Variations
While the classic Margarita Balls recipe is a crowd-pleaser, there are plenty of substitutions and variations you can explore to make it uniquely yours.
For a gluten-free option, swap all-purpose flour with a gluten-free blend. Want a richer flavor? Try using brown sugar instead of white sugar.
If you’re not a fan of lime, lemon zest or even orange zest can add a delightful twist. You can also experiment with flavored margarita mixes, like strawberry or mango, to change things up.
Don’t hesitate to add a touch of salt to the powdered sugar before dusting for an extra flavor kick!
What to Serve with Margarita Balls
After you’ve explored some fun substitutions and variations for Margarita Balls, you might wonder what to serve alongside this delightful dessert.
I love pairing them with a revitalizing fruit salad, bursting with vibrant flavors that complement the zesty lime. A scoop of coconut sorbet adds a creamy, tropical touch, too.
If you’re feeling indulgent, a light drizzle of chocolate sauce can elevate the experience.
For drinks, serve up some chilled margaritas or a crisp sparkling water with lime to keep the fiesta vibe going.
These pairings enhance the Margarita Balls while keeping the atmosphere fun and festive!
Additional Tips & Notes
To guarantee your Margarita Balls turn out perfectly, I recommend measuring your ingredients accurately and using room temperature butter and eggs. It really makes a difference in texture and flavor.
Don’t skip the lime zest; it brightens the whole dessert! If you prefer a stronger margarita flavor, feel free to add a bit more margarita mix.
For a fun twist, try garnishing with lime slices or a sprinkle of sea salt on top.
Finally, let the bars cool completely before cutting them; this guarantees clean slices.
Enjoy these delightful treats at your next gathering, and watch them disappear!